Photoshop provides you with patterns which are usually used to tile a portion of your image you are editing. We will show you how to use a pattern and if none of the patterns provided with Photoshop suits your needs, you can create your own using one of two methods. We will be showing you how to sample a pattern and how to use the Pattern Maker filter (if you are running Photoshop CS4, you will need to download this filter). We will also, show you what is a Patterns Overlay option within the blending options of layers and how to duplicate a layer.
Currently we are using Windows Vista Home Premium 64 Bit and the Photoshop CS4 Extended 64 Bit version.
Knowledge You Need to Know:
If you are unfamiliar with certain areas that are not covered in this tutorial, feel free check out other tutorials on our website. We have many different types of tutorials that can be downloaded (Video, PDF) or viewed online that will train you for free! Once you have the knowledge, feel free to come back and go through this tutorial again.
Preparing For This Tutorial:
You will be using the Sky image which we have used in past tutorials. If you do not have this image, please scroll down to the “Click Picture To Download Supporting Files” and download the image. Please open the image DSC03562 in the Photoshop Program.
Creating A Duplicate Layer
As we stated, we will not be diving into Layers this tutorial, but we want you to get your feet wet again (in the Custom Brushes tutorial, we showed you a few areas of layers). Layers will be located in the palette window. If it is not open, please refer to The Work Area tutorial which talks about palettes.
By now you should have the Sky picture open. Let’s look at the Layer palette. You will notice a Background Layer. It is ALWAYS a good idea before you edit/change any photos is to duplicate the layer. One of the important reasons to duplicate a layer is to allow you to refer to the original image at any time. Sometimes you will forget what objects are in the original image. Also until you have a new layer, you can’t do blending options.

The easiest way to duplicate that layer is to use CTRL-“J”. Photoshop Tip – If you had multiple layers already, you need to make sure you Left click the Layer you want to duplicate and make sure it is highlighted.
Now you will see you have 2 layers. It will highlight the current Layer which is called always “Layer 1” (unless you rename it). See how easy it is to create layers?

Using Patterns
Now it is time to get to the Blending Options screen.
| A). Right click on the “Layer 1” word. Do not Left click on the word or do not Right click on the image in the layer or you may get a different menu. | |
| B). You will see a new menu displayed. Left click on “Blending Options…”. |

Now Left click on “Pattern Overlay” (not the checkbox, but the word). You should see your image change in the center of the window.

Remember, we are only going to get your feet wet with Patterns. Here are the true basics of the “Pattern Overlay” option. In a future tutorial we will be discussing most of the “Blending Options” and for now, let’s focus our attention on the “Pattern Overlay” option.
| A). Left click the drop-down box. | |
| B). Left click on the pattern name (if you had more than a few patterns, you would have to use the scrollbar to display the rest of the patterns. | |
| C). When you are happy with your selection, Left click the “OK” button. If you are not pleased with the selection, you can always Left click on the “Cancel” button. |
You will now see the image change to a tiled version of the pattern. Photoshop Tip – If you used one of the selection tools before you selected a pattern overlay, it will only fill that portion of the image.

Sampling A Pattern
Unless you want to use the whole image as a pattern, we would recommend that you select a portion of the image. Please refer to the Selecting Image Content tutorial or even the Magical Colors And Selections tutorial for more information.
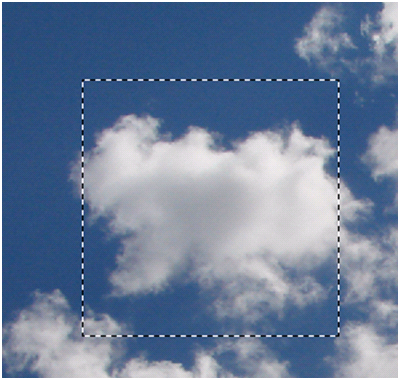
Left click the “Edit” menu and Left click on the “Define Pattern…” command.

Left click on the “Name” field and enter a name and then Left click the “OK” button to continue.

You should now see the Pattern in the list. Photoshop Tip – If you hover over a pattern, it will tell you the pixel size (see example below).

Downloading Filter?
For some reason Adobe removed the Pattern Maker from the Photoshop CS4 program. If you are using Photoshop CS4, you will need to download the filter. Before proceeding, verify that you have the Pattern Maker which is located in the “Filter” menu and is usually located towards the top of the menu.
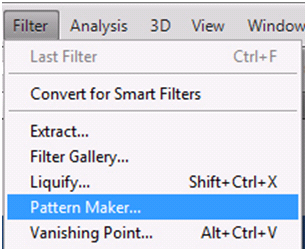
If you DO NOT have the Pattern Maker Filter, please follow these instructions below. Because the Photoshop program is on the Mac and Windows, please Left click the correct link to download your version of this Filter.
Because it is different to install on the Mac or even Windows Vista versus XP or even a 64 bit and a 32 bit, we recommend that you follow the instructions on the site. Once installed, you will need to make sure you restart Photoshop CS4 before you can see the changes.
Using The Pattern Maker Filter
First, select your image, or if you would like to use the whole image, please skip this step. Photoshop Tip – For us it is easier to select a portion of the image before we get into the Pattern Maker, but please note you can always make the selection once you are in the Pattern Maker screen.

Left click the “Filter” menu and Left click “Pattern Maker…”.

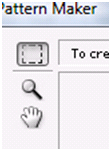
There is a lot to this screen, but we just want to go over some of the basics you will find in the Pattern Maker Filter. We have discussed the Marquee Selection tool (Selecting Image Content tutorial) which is located on the top left hand side of the screen. We have also trained in the Magnifying Glass (Zoom And Panning tutorial). Finally you will see the Hand Tool which was discussed in the Zoom And Panning tutorial. These 3 tools will allow you to fine tune your selection.
Now look to the right hand side of the screen.
| A). When you want to preview the pattern, Left click the “Generate” button. | |
| B). If you Left click in the boxes or Left click the arrow and use the slider bar to change the numeric value, you can change the Width & Height. | |
| C). Offset has the following options: None, Vertical, Horizontal. If you Offset the pattern it will shift the image either up or down or left or right (Vertical, Horizontal). | |
| D). Amount is how much you want to Offset it by. This is a percentage. On the example below, we have selected 50% and vertical. | |
| E). Smoothness controls the smoothness of the Pattern tile. Use the drop-down box to change it from 1-3. | |
| F). Sample Detail will set the size of the details in the pattern sample. | |
| G). If you want a color border around your pattern, first Left click the color box and change your color. Please refer to the Colors And Painting Tools tutorial which talks about changing the color. Once you have changed the color, Left click on the “Tile Boundaries” checkbox. On our example, we left it as neon green and selected the “Tile Boundaries” box. |

Here is the example of our new pattern.
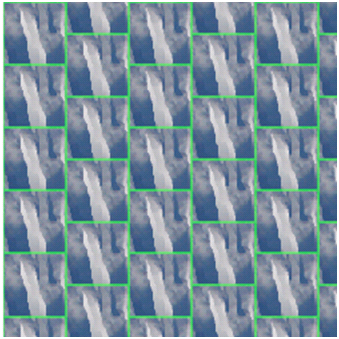
You will notice the Preview will display the sample of your pattern. To Save your pattern, Left click on the image of the disk which is located on the left hand side underneath the pattern preview. Photoshop Tip – As you generate different patterns, you can use the < or > in the preview to view the different generated patterns.
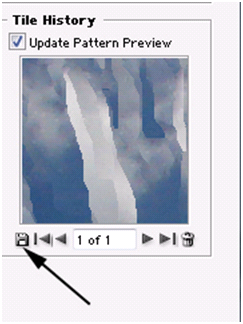
Left click the “Name” field and enter the Pattern Name. Left click the “OK” button or if you are not happy with the pattern, Left click the “Cancel” Button.

If you want the image to tile your pattern, Left click the “OK” button in the Pattern Maker. If you want to bypass Photoshop using the Pattern, Left click on the “Cancel” button. If you go into the blending options (make sure you duplicated the layer with CTRL-J), you will see your new pattern.

Deleting Patterns
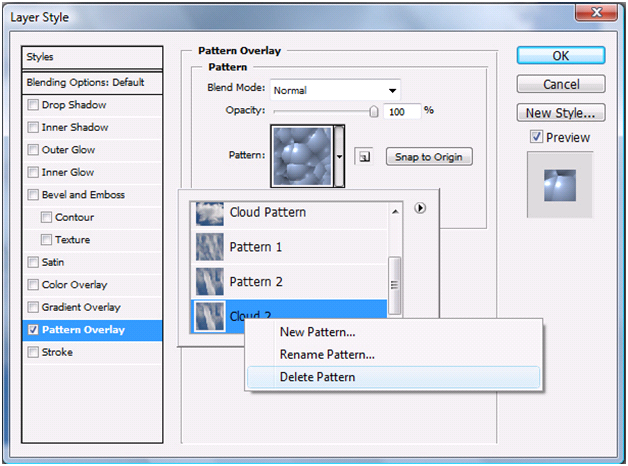
To Delete/Rename a Pattern, the easiest way is in the blending options. If your Right click the pattern name, you can Left click the Delete/Rename Pattern options.
Miscellaneous Information
We will not be covering how to install Patterns from a web at this time, but just to let you know, you are not limited to you creating Patterns. If you do a search for “Free Photoshop Patterns” you will find a lot of sites were you can download these types of files. Photoshop Tip – The file extension for Pattern files in Photoshop is “.PAT”.
By now you should know of a few ways to create patterns in Photoshop CS4. We are sorry if you had to download the Adobe additional Filters, but for some reason Adobe removed some of the Filters in Photoshop CS4.
Please take the time and see how much knowledge you have learned in this course by taking the 10 questions quiz below.
Quiz
1). After you have made your selection, what menu would you find the “Define Pattern…” command in?
| A). Filter. | |
| B). Edit. | |
| C). Pattern. | |
| D). File. |
2). What is the keyboard shortcut to duplicate a layer?
| A). CTRL-“L”. | |
| B). ALT-“L”. | |
| C). CTRL-“J”. | |
| D). ALT-“J”. |
3). What is one way to use the Patterns?
| A). Go into “Blending Options” and use it in the “Patterns” section. | |
| B). In the “Edit” menu, select “Patterns Options”. | |
| C). In the “Edit” menu, select “”Use Patterns”. | |
| D). Go into “Blending Options” and use it in the “Patterns Overlay” section. |
4). What do you do if you do NOT see the Pattern Maker filter in the menu?
| A). Left click on the link in the tutorial and download/install the filter. | |
| B). Within the “Edit” menu, Left click, “Preferences” and Left click “Add Additional Filters”. | |
| C). Install Photoshop CS3, because you can’t use it in Photoshop CS4. | |
| D). It will always be in the Filter menu and you do not need to do anything. |
5). In the Pattern Maker Filter, what is “Offset”?
| A). It means you can change the color by a shade. | |
| B). This will only sharpen the edges of the pattern. | |
| C). It will shift the image left or right or up and down. | |
| D). It flips the colors of the pattern. |
6). How do you delete a pattern easily?
| A). Within the “Pattern Overlay”, Right click the pattern and Left click delete. | |
| B). Within the “Edit” menu, Left click “Manage Patterns”. | |
| C). Locate your pattern and drag it to the “Delete” button. | |
| D). Go into the “Preset Manager” and locate the pattern and select the “Delete Pattern” button. |
7). What is the file extension of Pattern files.
| A). “.PTN”. | |
| B). “.PRN”. | |
| C). “.PAT”. | |
| D). “.PAF”. |
8). How do you find out the pixel size of a pattern within the Pattern Overlay section?
| A). Right click the pattern and Left click “More Details”. | |
| B). Hover over the pattern and a box will display the pixels. | |
| C). Drag the pattern to the “More Details” button. | |
| D). Left click the Pattern, and Left click the “Info” button. |
9). By default the first duplicate layer you create is called what name?
| A). Layer. | |
| B). Background. | |
| C). Dup Layer. | |
| D). Layer 1. |
10). Within the Pattern Maker, how do you add a colored border around your pattern?
| A). Left click the “Border” checkbox. | |
| B). Left click the “Tile Boundaries” checkbox. | |
| C). Draw with Rectangle Tool and then select a color. | |
| D). Left click the “Border” box and a new window will be displayed to select the color. |
Answers: 1). B 2). C, 3). D, 4). A, 5). C, 6). A, 7). C, 8). B, 9). D, 10). B
Scoring:
0 - 5 = Please review the video tutorial and re-read this document either offline (PDF) or online.
6 – 8 = We would recommend that you print this document off and read it at a later time.
9 – 10 = Congratulations you have passed the quiz. Go ahead and view another tutorial on our site.
We hope you enjoyed this detailed tutorial. Please visit us at: http://www.Photoshopeducation.blogspot.com to expand your knowledge within Adobe Photoshop.

Click Picture To Download Video File To View Offline
Download Total Video Player, iTinySoft

Click Picture To Download PDF Tutorial
Download Adobe Reader, Adobe Corporation
Click Picture To Download Supporting Files
(Brushes, Textures, Fonts, Images, Actions, .PSD, Etc.)
Download ZipGenius Standard Edition 6.0.3.1150, Dicono di ZipGenius


This is what I have been searching in many websites and I finally found it here. Amazing article. I am so impressed. Could never think of such a thing is possible with it...I think you have a great knowledge especially while dealings with such subjects.
ReplyDeleteclipping path
Great and excellent tutorial. You can use clipping path service
ReplyDeletefor beauty enhancement of images Thanks for sharing your photos and nice info.